

|
Tutorial: How to read iOS DocumentationThis happens usually several times during the day. "Read the documentation". "It' explained in the documentation!". And then everyone starts pulling out their hairs in frustration, because HOW do you read the f****** documentation?
In the beginning it very hard to figure out how to use the documentation correctly to actually figure out what you need to do to in order to make "things" happen in your app. It is written in English, but it might as well have been written by Klingons. So therefore you end up using sites such as StackOverflow a lot search for solution. Which can help sometimes, but in the end, knowing how to read the documentation will get you a lot further! So this is my approach to reading and using the iOS Documentation. I am not saying this is the right way, the best way or the smartest way. It' just my way to make sense of the Documentation. Please comment below if you have any suggestions of other ways of doing this. * Note: The project file can be downloaded at the bottom of this blog * |
Step 1
|
Let's take an example of wanting to retrieve location and date from a photo in your photo library.
*** I will assume that you have already chosen an image from the Photo Library using ImagePicker. The code to do that is below. Look at this website for more detail. |
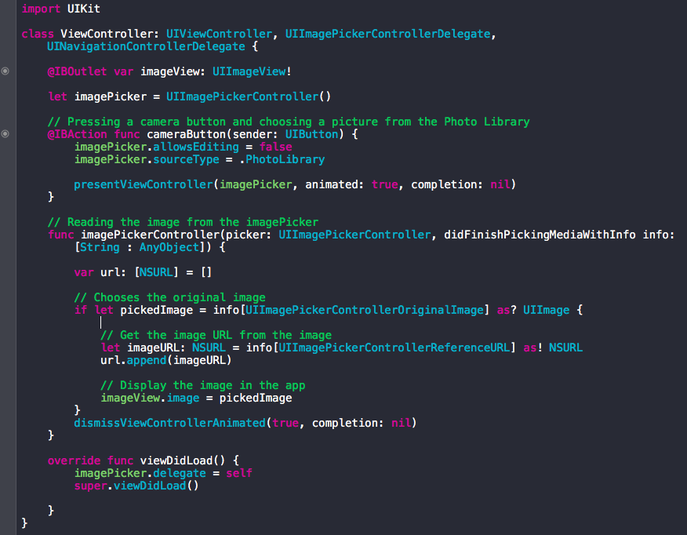
The picture you select in you Photo Library is picked and returned with "info". This info also contain an reference URL to the place where the picture is stored on your phone. We will use this URL to later fetch the metadata of the picture.
Step 2
|
Go to the Documentation (either from the help tab or press shift-cmd-0).
Ways of searching in the Documentation: 1) Using the Search Field Using the search field to find what you are looking for are usually quite good, but it can also be challenging to find the right functions you are looking for. I want to find the location of a photo, so I typed "photo location". These are the results it came up with below. Reading through them it makes sense to look into "location - Reading Asset Metadata". |

This will bring up a class called PHAsset. That is what we are looking for.
2) Using the navigator
Another way of find what you need is to go via the Navigator. If you clock the navigator button on the top left next to the arrows (number 1) then you will get a menu that shows the contents of the iOS Documentation.
2) Using the navigator
Another way of find what you need is to go via the Navigator. If you clock the navigator button on the top left next to the arrows (number 1) then you will get a menu that shows the contents of the iOS Documentation.

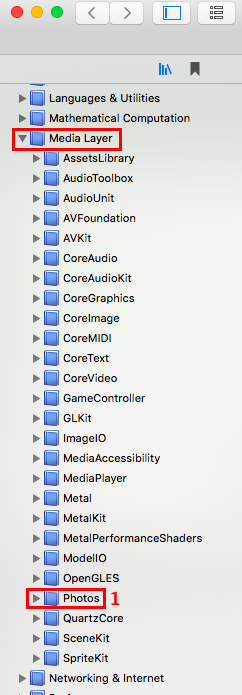
Here you can look for either iOS, OS, tvOS, watchOS or xCode documentation. We want to work with iOS so we expand that column (number 2), and we are looking for photos, which is under Media Layer (number 3). It's smart to look a bit through these folders a bit to familiarise yourself with the content and where you can find things.
If we expand media layer we will see that there is a category for Photos (number 1)
If we expand media layer we will see that there is a category for Photos (number 1)
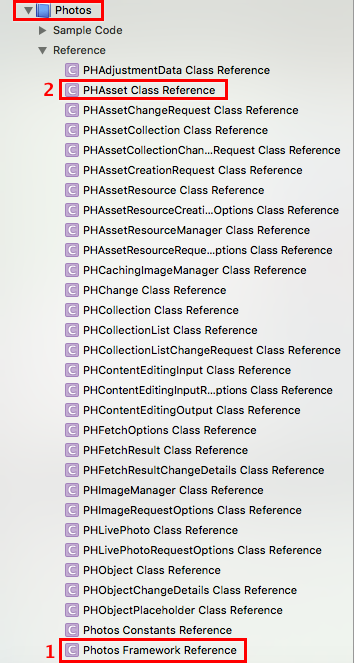
If we expand that even further we get all the Class References that belongs to Photos. Sometimes you have to look through these to find what you are looking for. One good tip is to look for the keyword "Framework". At the bottom you can see Photo Framework Reference (number 1). You can also see PHAsset Class Reference (number 2), which we found earlier.
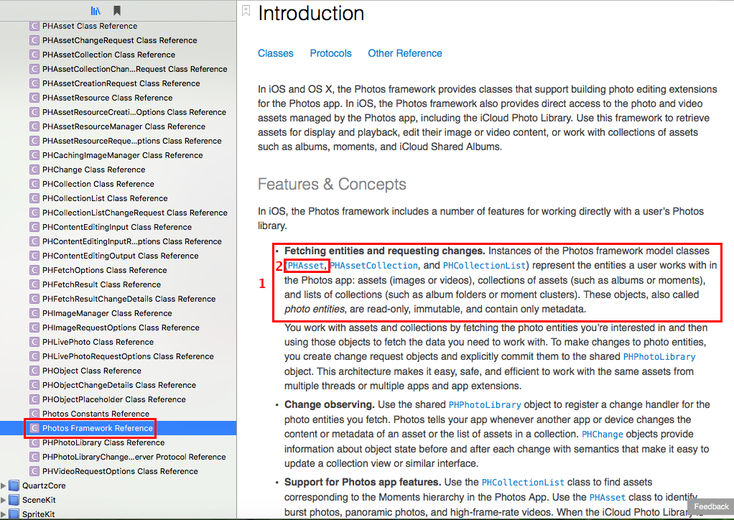
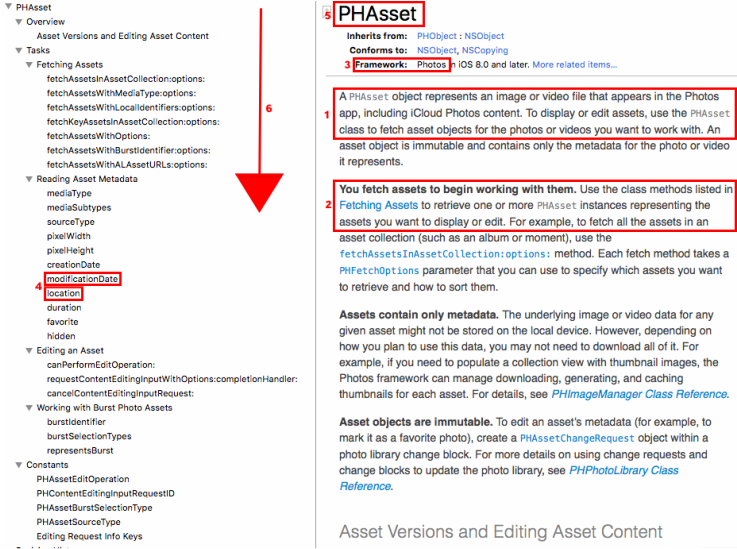
If we look into the Photos Framework Reference we see that with this framework we can fetch photos and their metadata (number 1). And that PHAsset (number 2) represents an instance of Photo. So we can click that and go further.
Step 3
|
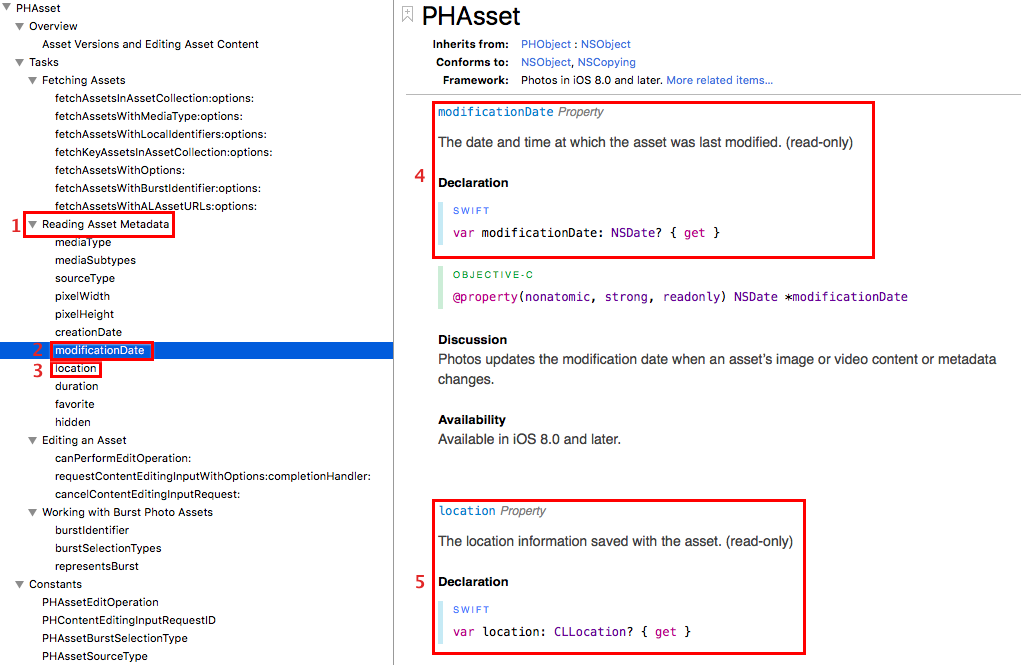
Reading though PHAsset we can see six things:
|
Step 4
|
Before you can initialize a PHAsset object you need to make sure that the proper framework has been imported. We know from the Documentation that we need to import the Photos Framework to do this. So add this to the top of your code.
|

Step 5
|
Now you need to initialize the object you want, in our case a PHAsset. If we look in the documentation we see that we can fetch an PHAsset in several ways.
|
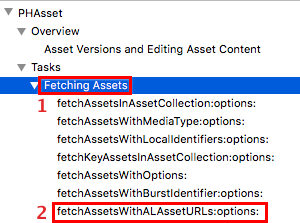
We have already gotten an URL from when we picked the image from the Photo Library (let imageURL: NSURL = info[UIImagePickerControllerReferenceURL] as! NSURL), so we can use fetchAssetsWithALAssetURLS:options: (number 2).
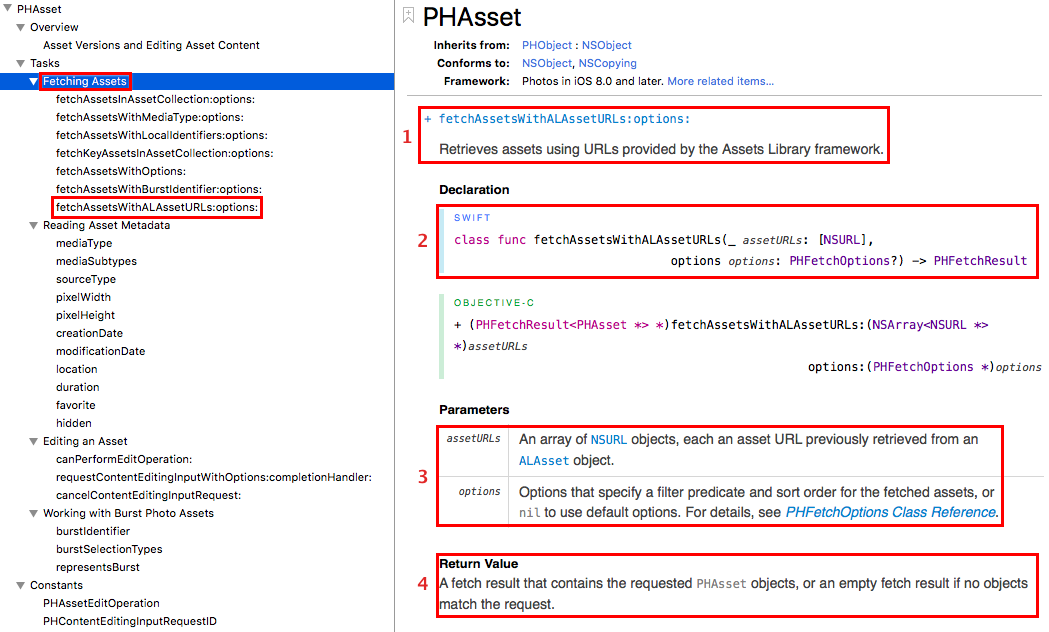
- Explains what the function is doing
- Shows how the function is written in Swift. Here you can see which paramaters the function needs to work, and also what it returns (what is after the -> )
- Explains the paramaters. Here you can go further into the paramaters to figure out how to make/get them
- Explains what the function returns. This function returns an PHFetchResult which contains the object (image) we want
Knowing all this we can start coding. We start by making a new variable that will hold the PHAsset. Then we fetch the image with the URL we have. We add this code to the method we have from before when the image is chosen (func imagePickerController).
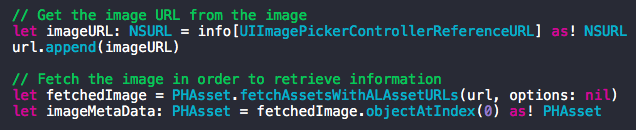
We fetch the object into fetchedImage. It is possible to fetch whole collections of pictures, therefore the image assets are stored in an array. Since we have only fetched one image we can easily find the image with calling .objectAtIndex(0) on the fetchedImage object. .objectAtIndex(0) is a function it is possible to call on any array. When we get the metadata we need to declare it as an PHAsset (as! PHAsset), otherwise the fetched object will be stored as an Anyobject, and then we can't get the location and date.
Now that we have the metadata we can see:
Now that we have the metadata we can see:
- What information we can get from the metadata
- We can get modificationData
- We can get location
- Information about modificationDate and how to call the function in Swift
- Information about location and how to call the function in Swift
We use this information to get the information we need. We add this code to app beneath the imageMetaData.

Step 6
|
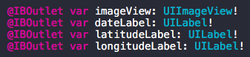
Now we just need to display this information in our app. We make three new labels in our storyboard and connect these to our viewcontroller file. We add this to the top of our code.
|
We then add update the labels with the information we just retrieved form the image asset. We add this below our let imageDateTaken varaiable.

Then we can run our code and look at the result! The formatting here is not the nicest since we have not done anything with that this time, but you can see the result.
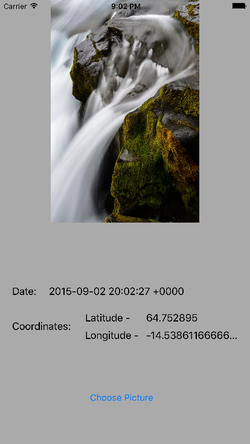
The date the picture was taken is the 2nd of September in 2015, and the coordinates point to a place in Iceland. It is possible to later convert these coordinates to a location to be shown on a map, and also get an address with it of you want. But that is for another tutorial!
I hope this tutorial made it a bit easier to understand how to read the iOS Documentation. This is not the only way, just my way. Learning how to read the documentation will help you a lot if you want to start developing apps.
The entire xcode project can be downloaded from below if you want to take a closer look.
| photoapp.zip |
